Photography
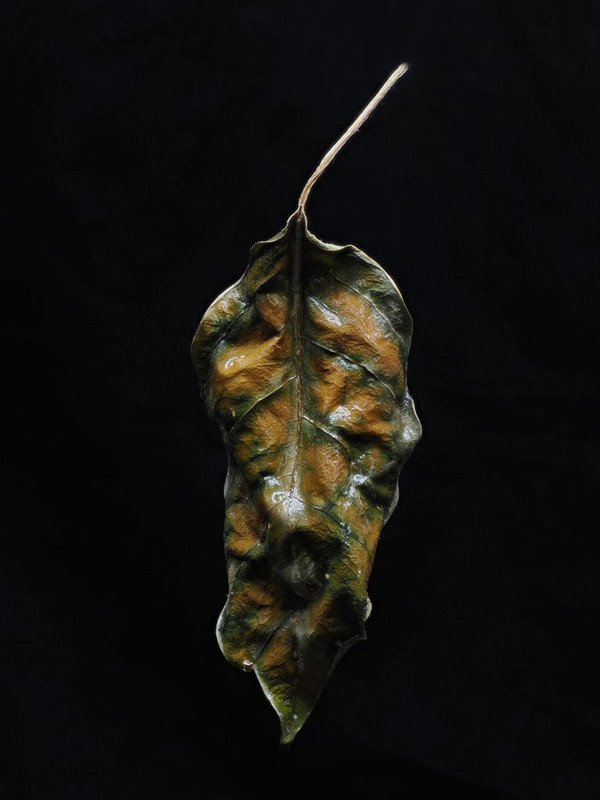
Related: About this forumFirst results from the new desktop studio. I have a way to go but first
attempts are promising. Lighting is going to take some tweaking. I need to design a gobo (go between) to block more light from the backdrop and it's just a tad harsh.
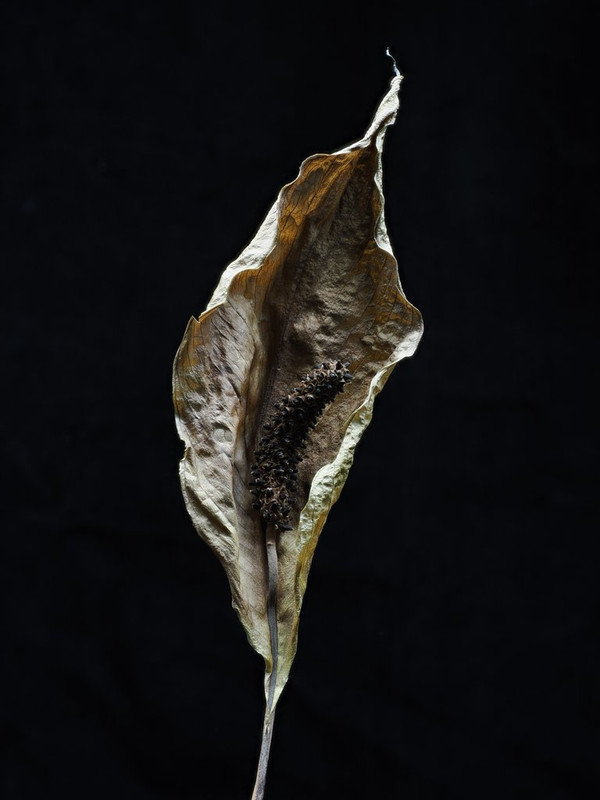
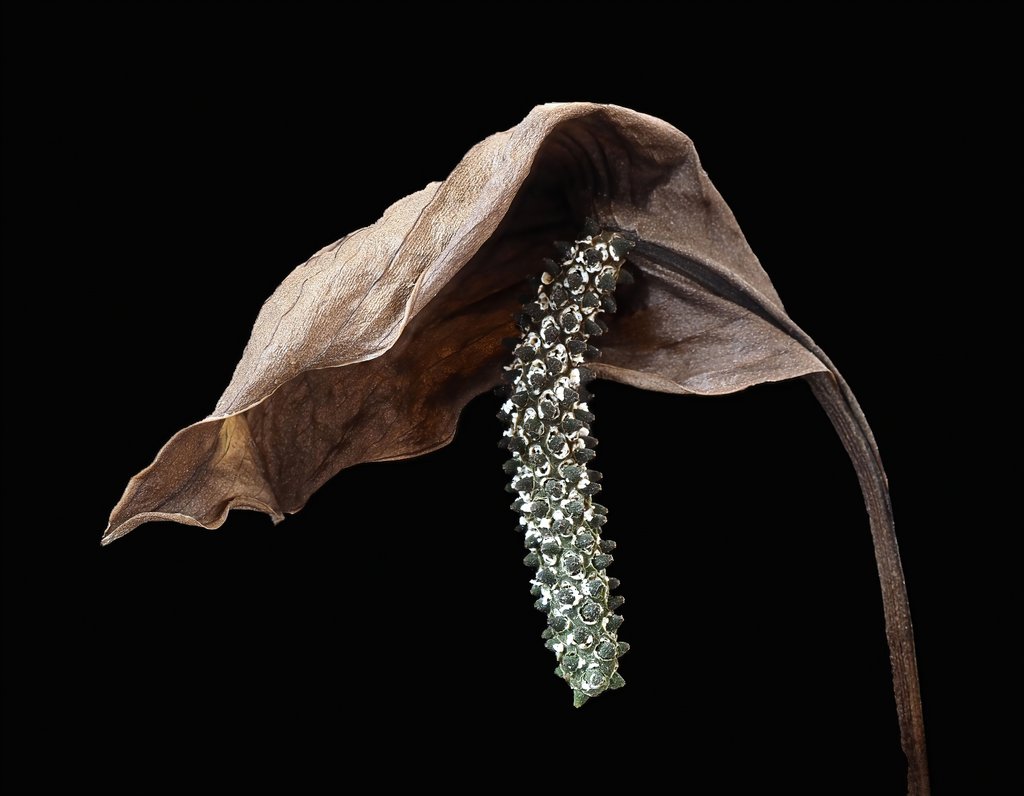
I have a real love affair with the peace lily in all it's phases.
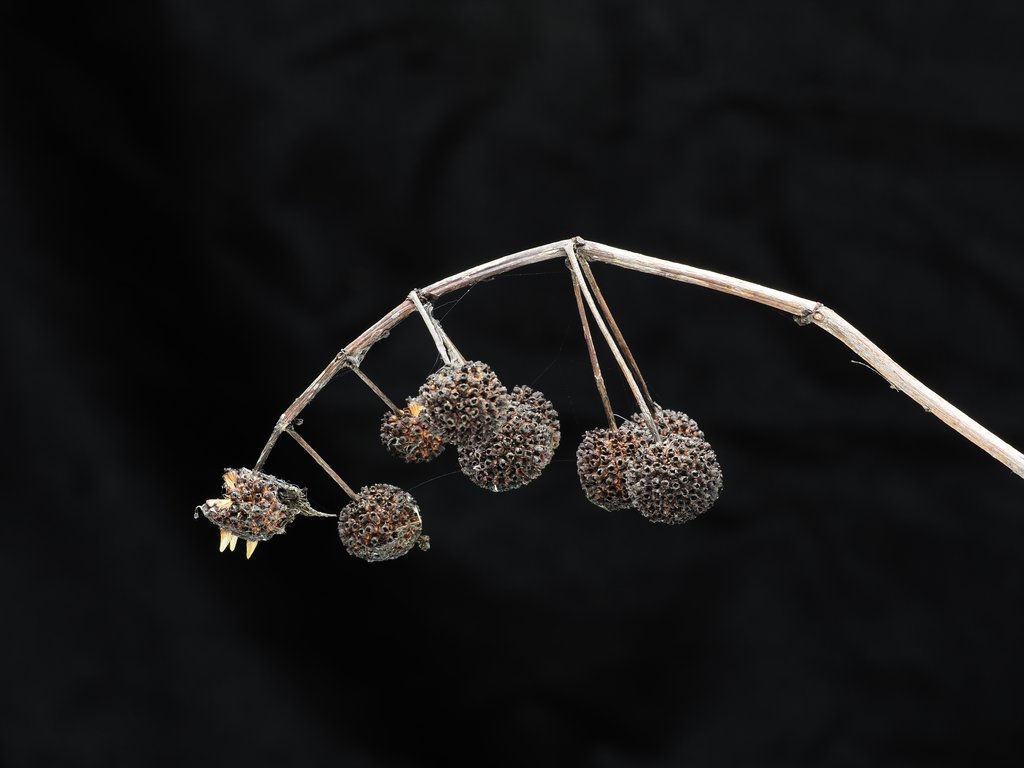
Just because my Scheff presented me with this . . .
 = new reply since forum marked as read
Highlight:
NoneDon't highlight anything
5 newestHighlight 5 most recent replies
= new reply since forum marked as read
Highlight:
NoneDon't highlight anything
5 newestHighlight 5 most recent replies
Walleye
(44,079 posts)

Old Crank
(6,774 posts)Of the background. Are you trying to make it solid black?

AndyS
(14,559 posts)look. There is a place for the look of folded velvet with it's glistening highlights as part of the picture to give context and support to the item being photographed, using it as a prop to support the subject. For the subject matter displayed here I really like to isolate it entirely.
It's a matter of how it fits the presentation as a whole plus I want to make that determination intentionally.

CaliforniaPeggy
(156,311 posts)CaliforniaPeggy
(156,311 posts)They have a certain kind of unity that I admire. I do like the first one as well, just not as much as the second two.
I look forward to seeing more of your work! It's clean and interesting.

KS Toronado
(23,395 posts)Just pulling your leg, sorry. 


Gato Moteado
(10,124 posts)what kind of diffusion are you using?
the reflection on the black background is so subtle, it's easy to black out completely in post.
AndyS
(14,559 posts)They are wide enough to completely span the 39 inch width. I have them positioned very near each other for a single light source effect. They can be moved fore and aft as well as clamped the the vertical frame and aimed at the rear. At this point there isn't any diffusion hence the harshness. One thing that mitigates the point source effect is that the ceiling in highly reflective foil. With only a single point light source I'm using reflectors on clamps placed as needed for fill.
So, as it is the light source is about 2 inches wide and 30 inches across. I think if I fabricate a diffuser 4 or 5 inches wide it would soften the light without destroying the modeling that a directional source provides.
I also have a video light (LED 4x5 inches) that I'm modding to use inside the cube. That would give a hard point source for those instances I want that sort of light. I can then use one of the light bars near the lens to provide fill. Of course there are LED flash lights for pin point highlights and such. Everything is daylight balanced at 5500 K.
I can do a lot in post but it's ever so much easier to just light it the way I want.
Like I said, gonna' take some tweaking to get what I'm looking for meanwhile it's serviceable as is.
Gato Moteado
(10,124 posts)....regarding fabricating a diffuser or diffusers, scrims can be made by creating simple wooden frames and stretching some white rip-stop nylon (available at joann fabrics) over them. these can be placed at any angle in front of the lights. IMHO, a speedlight or two will give you greater bursts of light and allow you to shoot at smaller apertures and lower ISOs.
i set up a very small micro studio to show a friend how she could do small product photography....this is a piece of white paper taped to the wall behind a shelf and tapered to the shelf to create a seamless white background. i used two yongnuo speedlights each with a $10 diffuser from amazon.

this is the kind of stuff i did test shots of with that setup:

in my regular studio, my original setup for frogs and other small animals was a white table with the same yongnuo speedlights, one on each side, on regular light stands and each with an umbrella that i paid about $20 each for:

If you don't have much space, this setup is not possible, of course. These are a few shots i took with this setup:


Shortly after, I bought a smaller but adjustable bench and added a 400w godox strobe (i think i paid about $125 each at B&H) on each side, each with a 95cm octogon softbox. Seems like overkill but this is what allows me to shoot at f/29 and ISO 64 and still have the flash recover within about a second so i can take several shots in succession. i added a black cotton background and a variety of clamps to hold branches (perches for the animals) above the table.

you've seen shots of mine with that setup...here are a couple:


so, now i see great close-up and macro shooters getting hand-held shots of in-situ animals with a single on camera flash and a custom close-up diffuser. these guys make me look like a tosser. this kid is in australia and he designed the diffuser he uses and he sells them for about $150...he uses olympus gear. yeah, i'm gonna buy one of these diffusers from him:
https://www.instagram.com/cygnustech/
i'm hoping that some of this craziness helps out or gives you an idea or two.
AndyS
(14,559 posts)I really like the results you get with your setup. For shooting living subjects that sort of light is essential: omni directional and LOTS of it. Lets the critters move around and still maintain uniform illumination.
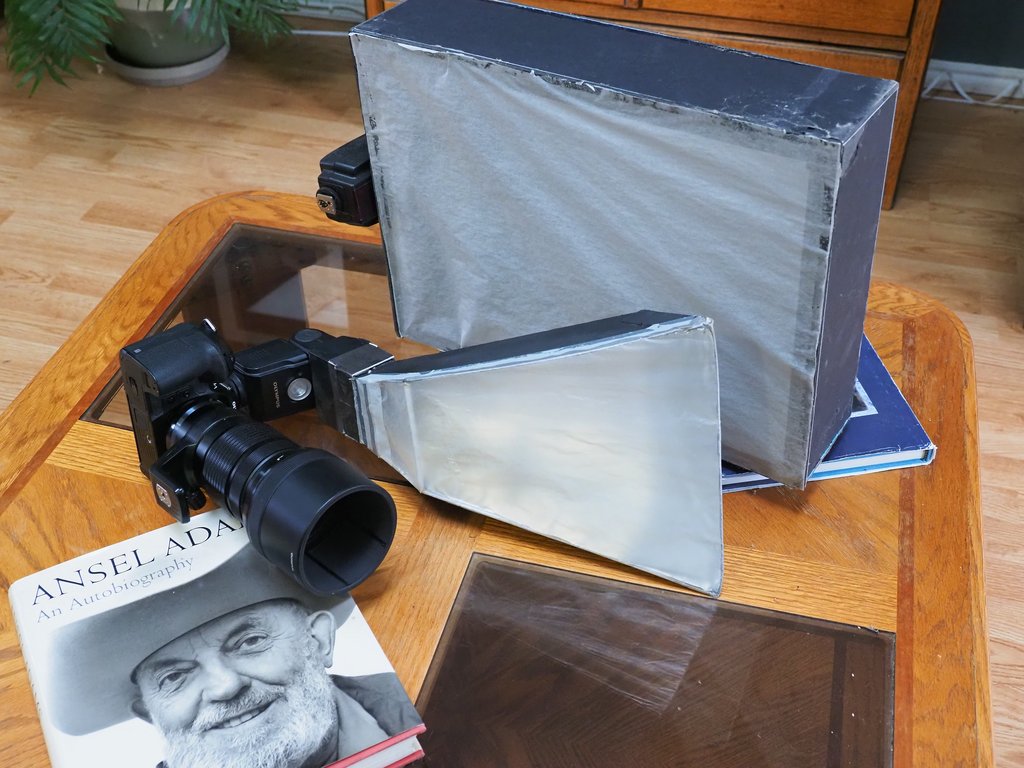
Here's my setup (at the risk of having someone alert me for spam)
Light box/studio
Here there are good illustrations of the box and it's light bars. The bars can be snapped anywhere on the tubular frame. I have them both near the front and close together. The box comes in various sizes from about 16" up to this 39". The smaller sizes are great for Ebay shooters. I had been using a 26" DIY box.
For still life I like using studio lights instead of flash. I can see where reflectors are needed and place them precisely for effect. Living critters need the instant light of flash.
To go with the box I've got these fabricated helpers:
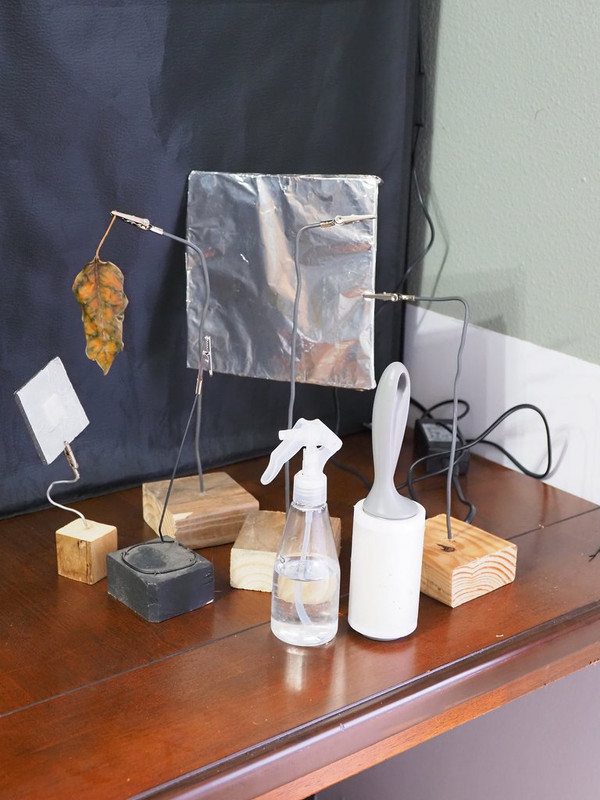
There are reflectors, gobos and holders. Basically a base, a length of copper or aluminum wire and a roach clip, er I mean an alligator clamp. (showing my age here). I refer to them as 'grabbies' and they're indispensable. There's also the ever present mister and a lint roller which will save hours of post processing cleaning lint off the black velvet. I also have a block of florist's clay to hold things at odd angles and prop them up.
The box is versatile in that it can mimic the 'everywhere' light like your setup and once I covered all the reflective walls it can produce very directional light. The directional light, while it can be harsh without reflectors and other modifying devices, gives shape (modeling) to the subject.
For field work I have a variety of DIY flash diffusers.
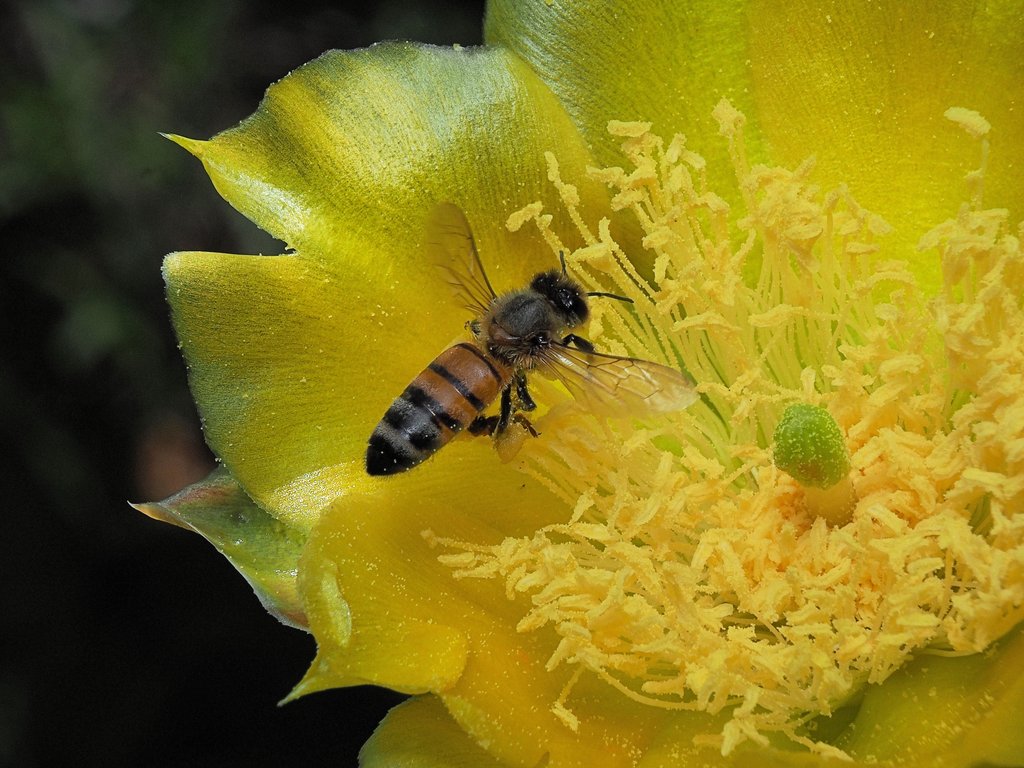
Most of my outdoor shooting is from one to three feet so the on camera box reaches out with either the 12-100 or 40-150 lens. Gets results like this:
I like the Australian guy's macro diffuser and will eventually get one.
This is a great exchange. If there are any lurkers they picked up a LOT of information and ideas.
Gato Moteado
(10,124 posts)....yes, that's a cool setup and much more portable than mine. i like that on camera diffuser you have too....yes, the bee shot has always been one of my faves of yours.
when it comes to lighting, the main thing i've learned is that there's always more to learn.
AndyS
(14,559 posts)I can't say as I have a favorite of what you've posted, they're all so vibrant and well done.
One last comment on lighting: find an online course in classic portrait lighting. After all be it wildlife, architectural or still life we are in essence taking a portrait of whatever is in front of the lens.
Gato Moteado
(10,124 posts)...i'll build a large rancho on my property near the house, bring power to it and you can come down and we can do a macro workshop, with the biodiversity of the osa at our fingertips. we should be able to find 8 or 10 people who will want to come down for that.
AndyS
(14,559 posts)Gato Moteado
(10,124 posts)a goal for 2023.