Cooking & Baking
Related: About this forumBaking bread
This is how I make bread when I just wake up in the morning and decide I want to make bread that day. It's a one day method where you can start in the morning and have it ready late afternoon. This is a no knead bread, so it's pretty easy to make once you get the hang of it. I use this recipe to make 2 loaves. If you only want one, simply halve the recipe. This recipe takes most of the day, but there's not that much prep time.
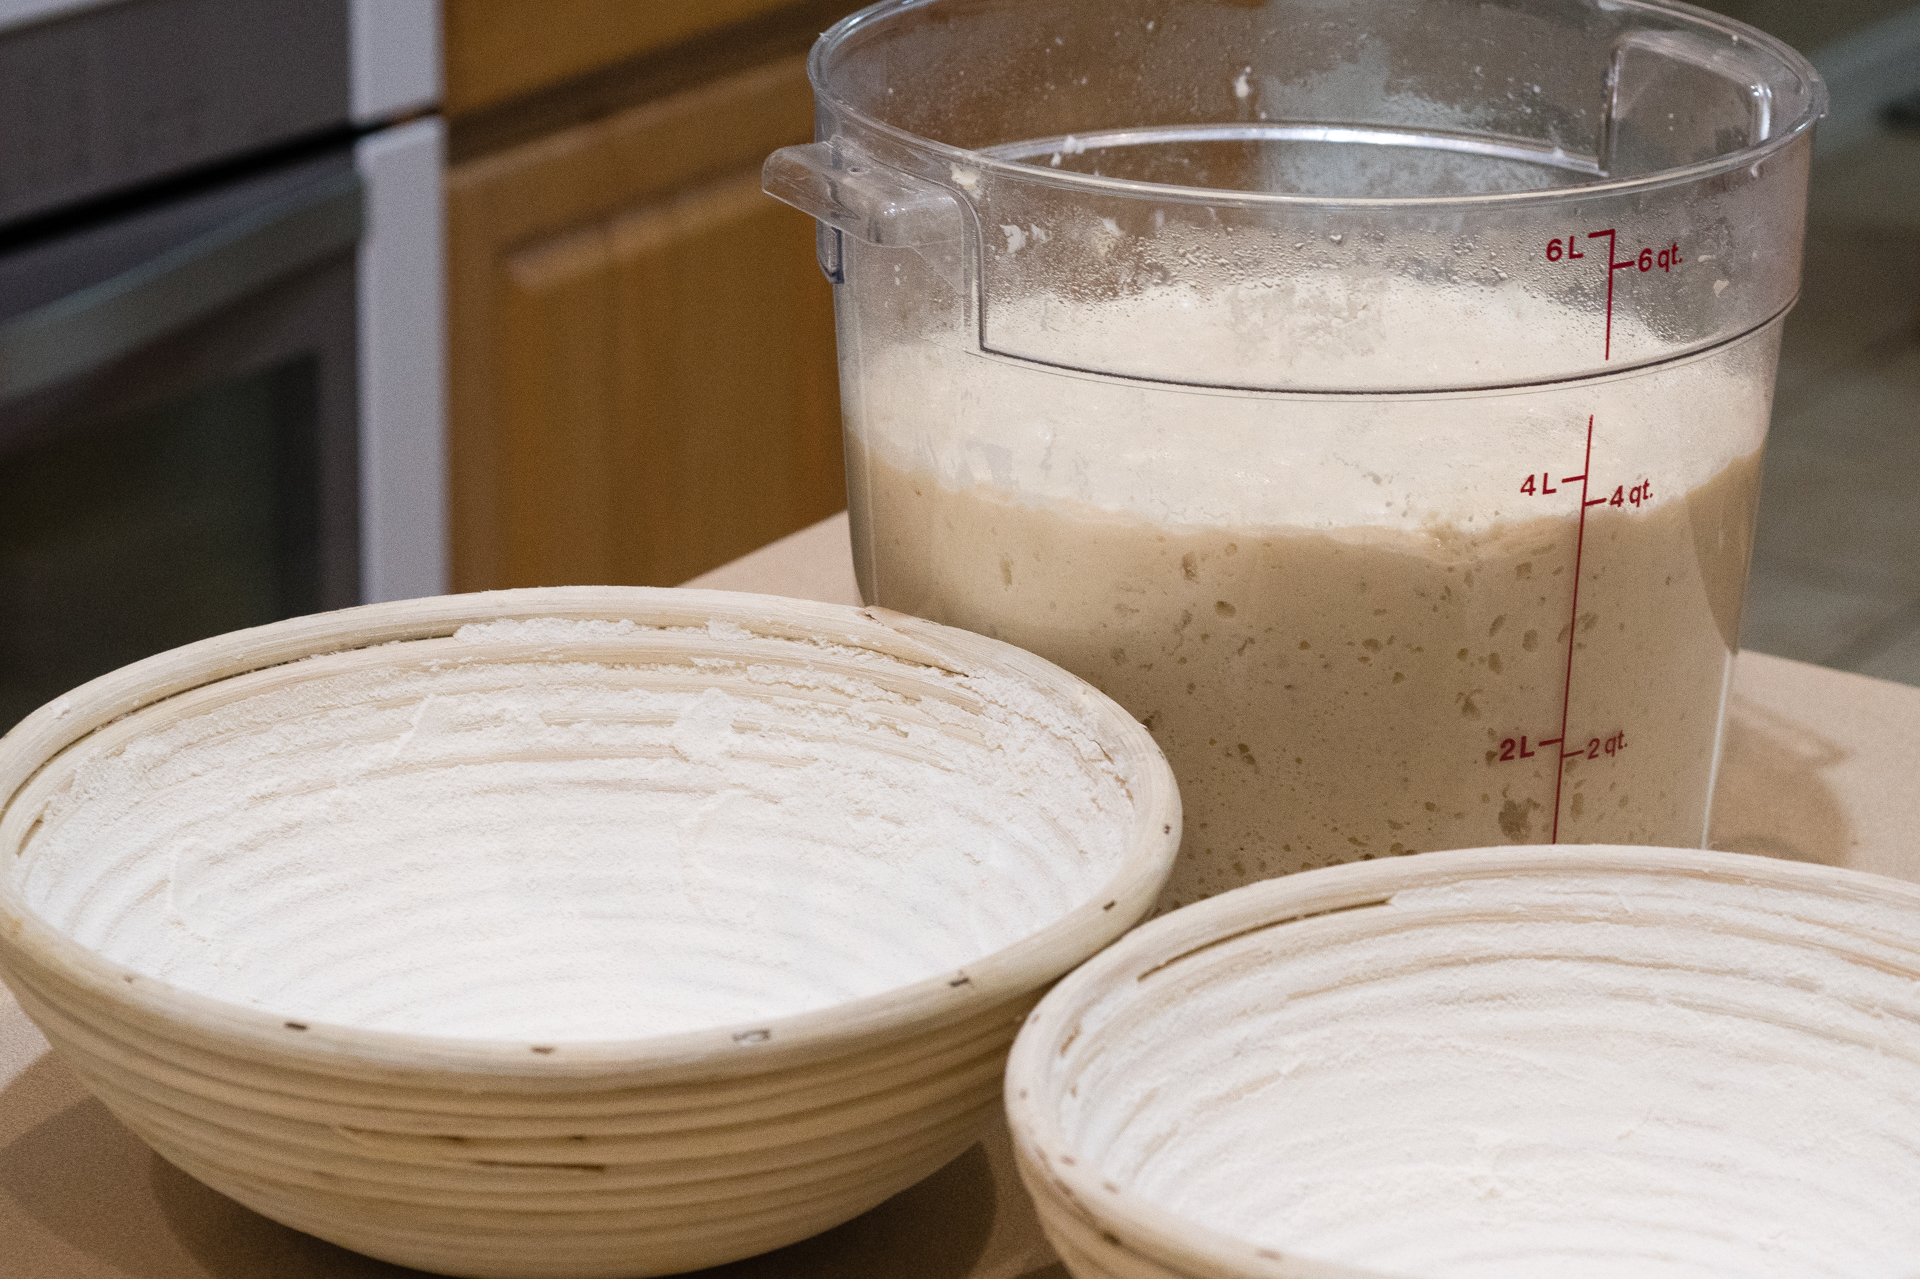
The ingredients are pretty simple as there's only 4. I have a few tools that make the job easier, but none of them are required as there's alternate items you can substitute you probably already have. If you don't have two dutch ovens, halve the recipe. If you don't have cast iron dutch ovens, use a steel one. It just needs a lid. You can bake these on a cookie sheet or a bread pan. I've never tried it and I suspect the crust won't be nearly as good, but it should work fine. If you don't have proofing baskets, use a well floured piece of cheesecloth inside a bowl or use a kitchen towel bunched up at the sides to maintain shape. If you don't have a polycarbonate mixing tub, use a mixing bowl and cover it with plastic or a towel.
I do most everything by weight which makes it much easier. If you don't have a kitchen scale you'll have to look up the volume equivalents, but I highly recommend using a scale especially when it comes to the flour and water as the ratio is important for good results.
Ingredients:
1000g all purpose flour (I use King Arthur)
720g water (~95 degrees F)
21g fine salt
3g sugar
4g commercial yeast (I use active dry but instant, rapid rise, or bread machine yeast works fine)
Measure out the flour in an 8qt polycarbonate tub, add salt and combine with a whisk or your hand.
If you are using instant or rapid rise yeast you can skip this step and just add the yeast to your mixture, or do it anyway as it's a good way to proof your yeast. In a small cup combine the yeast, sugar, and about 20-40g of the warm water and set aside for 5 minutes. At the end of the 5 minutes the mixture should be producing small bubbles letting you know the yeast is working.
Add the yeast mixture to the tub and rinse out the cup with the rest of the warm water into the tub. Combine everything with your hand (I use a wetted rubber glove). Cover the tub with a lid and allow to ferment for about 5 hours. The dough should double to triple in volume, so if your kitchen is cold you might need a bit more time (mine was 71F today). The dough was a bit below the 2qt mark after mixing and was at the 4qt mark after fermentation. The advantage to the poly tub is it takes the guess work out of it.
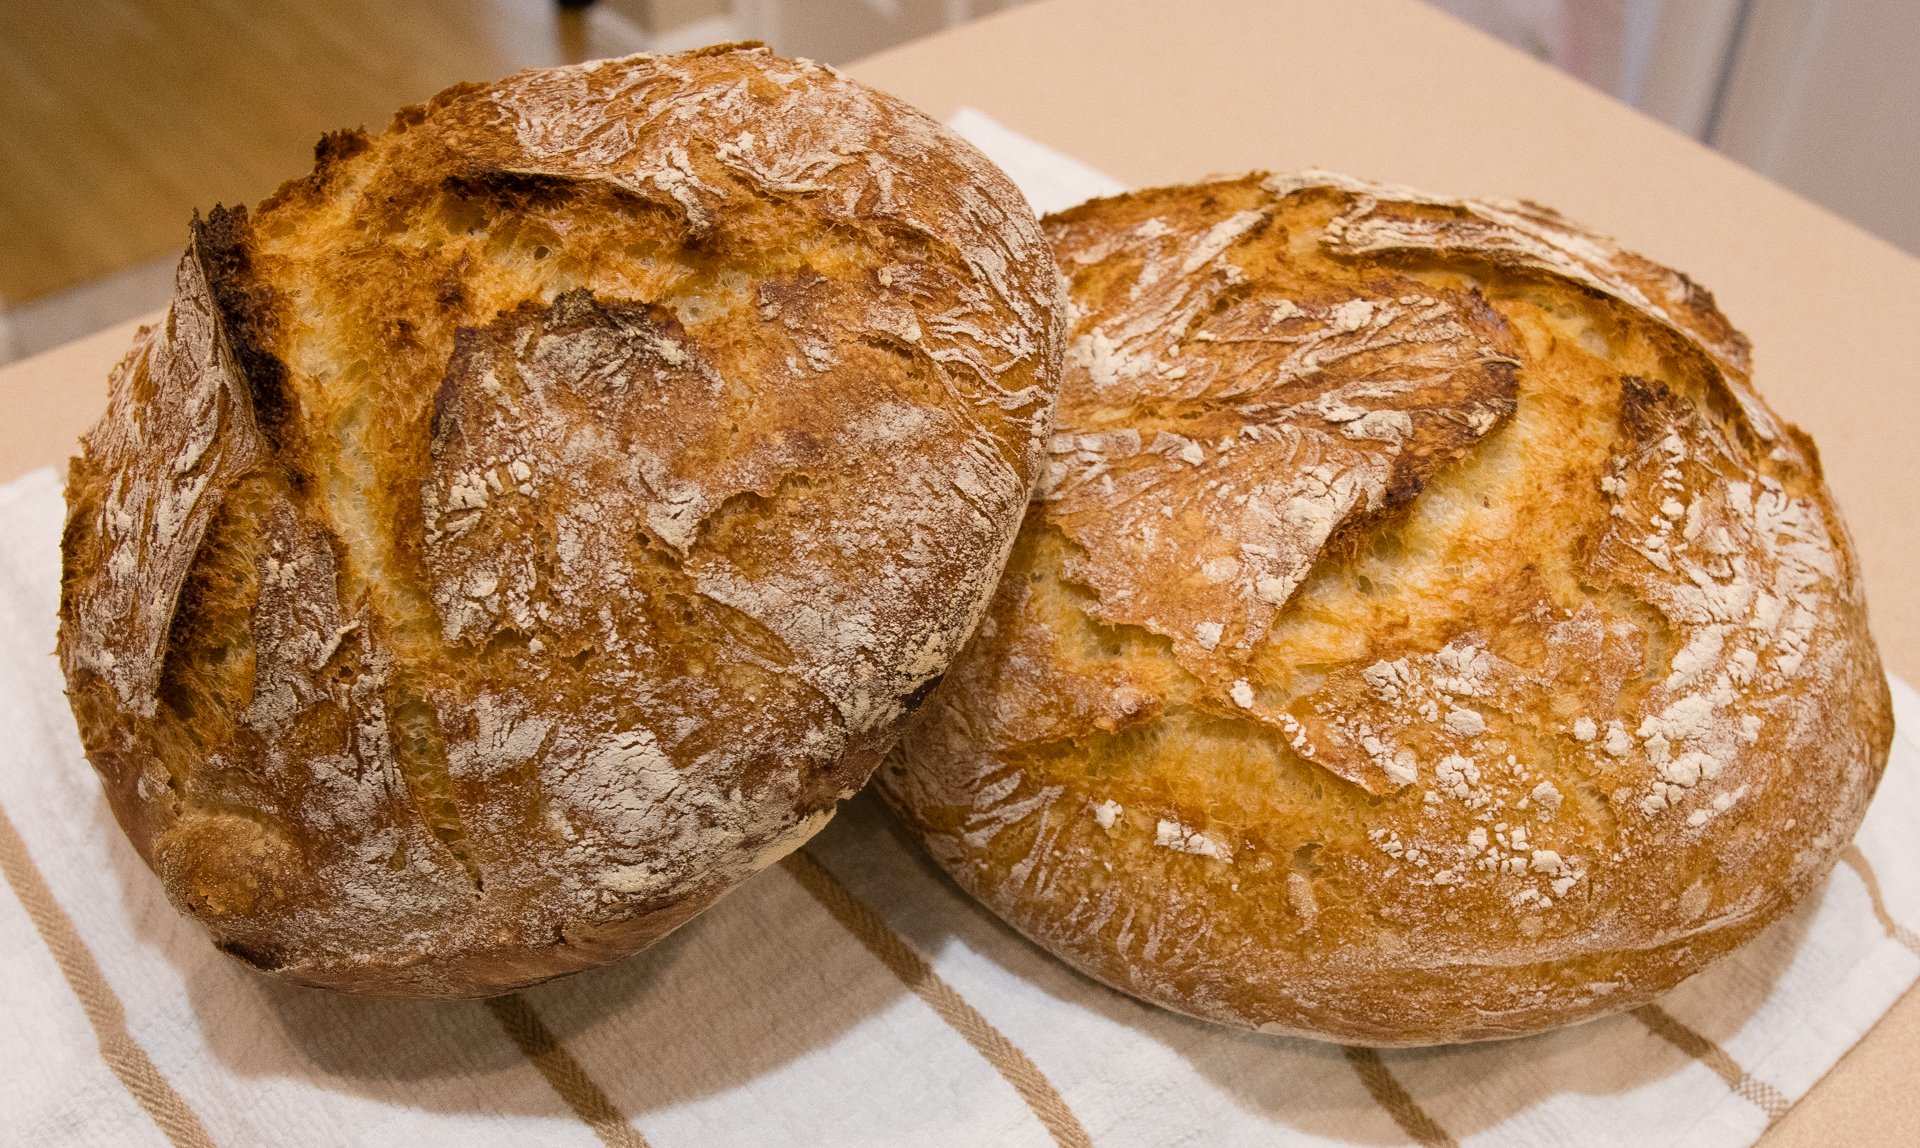
Pull the dough out onto a well floured surface. The dough will be slightly wet and very sticky, so I will sprinkle with some flour to make it workable. At this point I divide it in two. In my case I have a 6qt and a 4qt dutch oven so I make one at about 700g and one at about 1000g.
Pull the dough at each end stretching it to about double and then fold the ends into the middle. Repeat this about 2 more times turning the dough about 45 degrees one direction. Grab the ends with one hand squeeze to stretch the underside. Place the dough seam side down into a very well floured proofing basket.
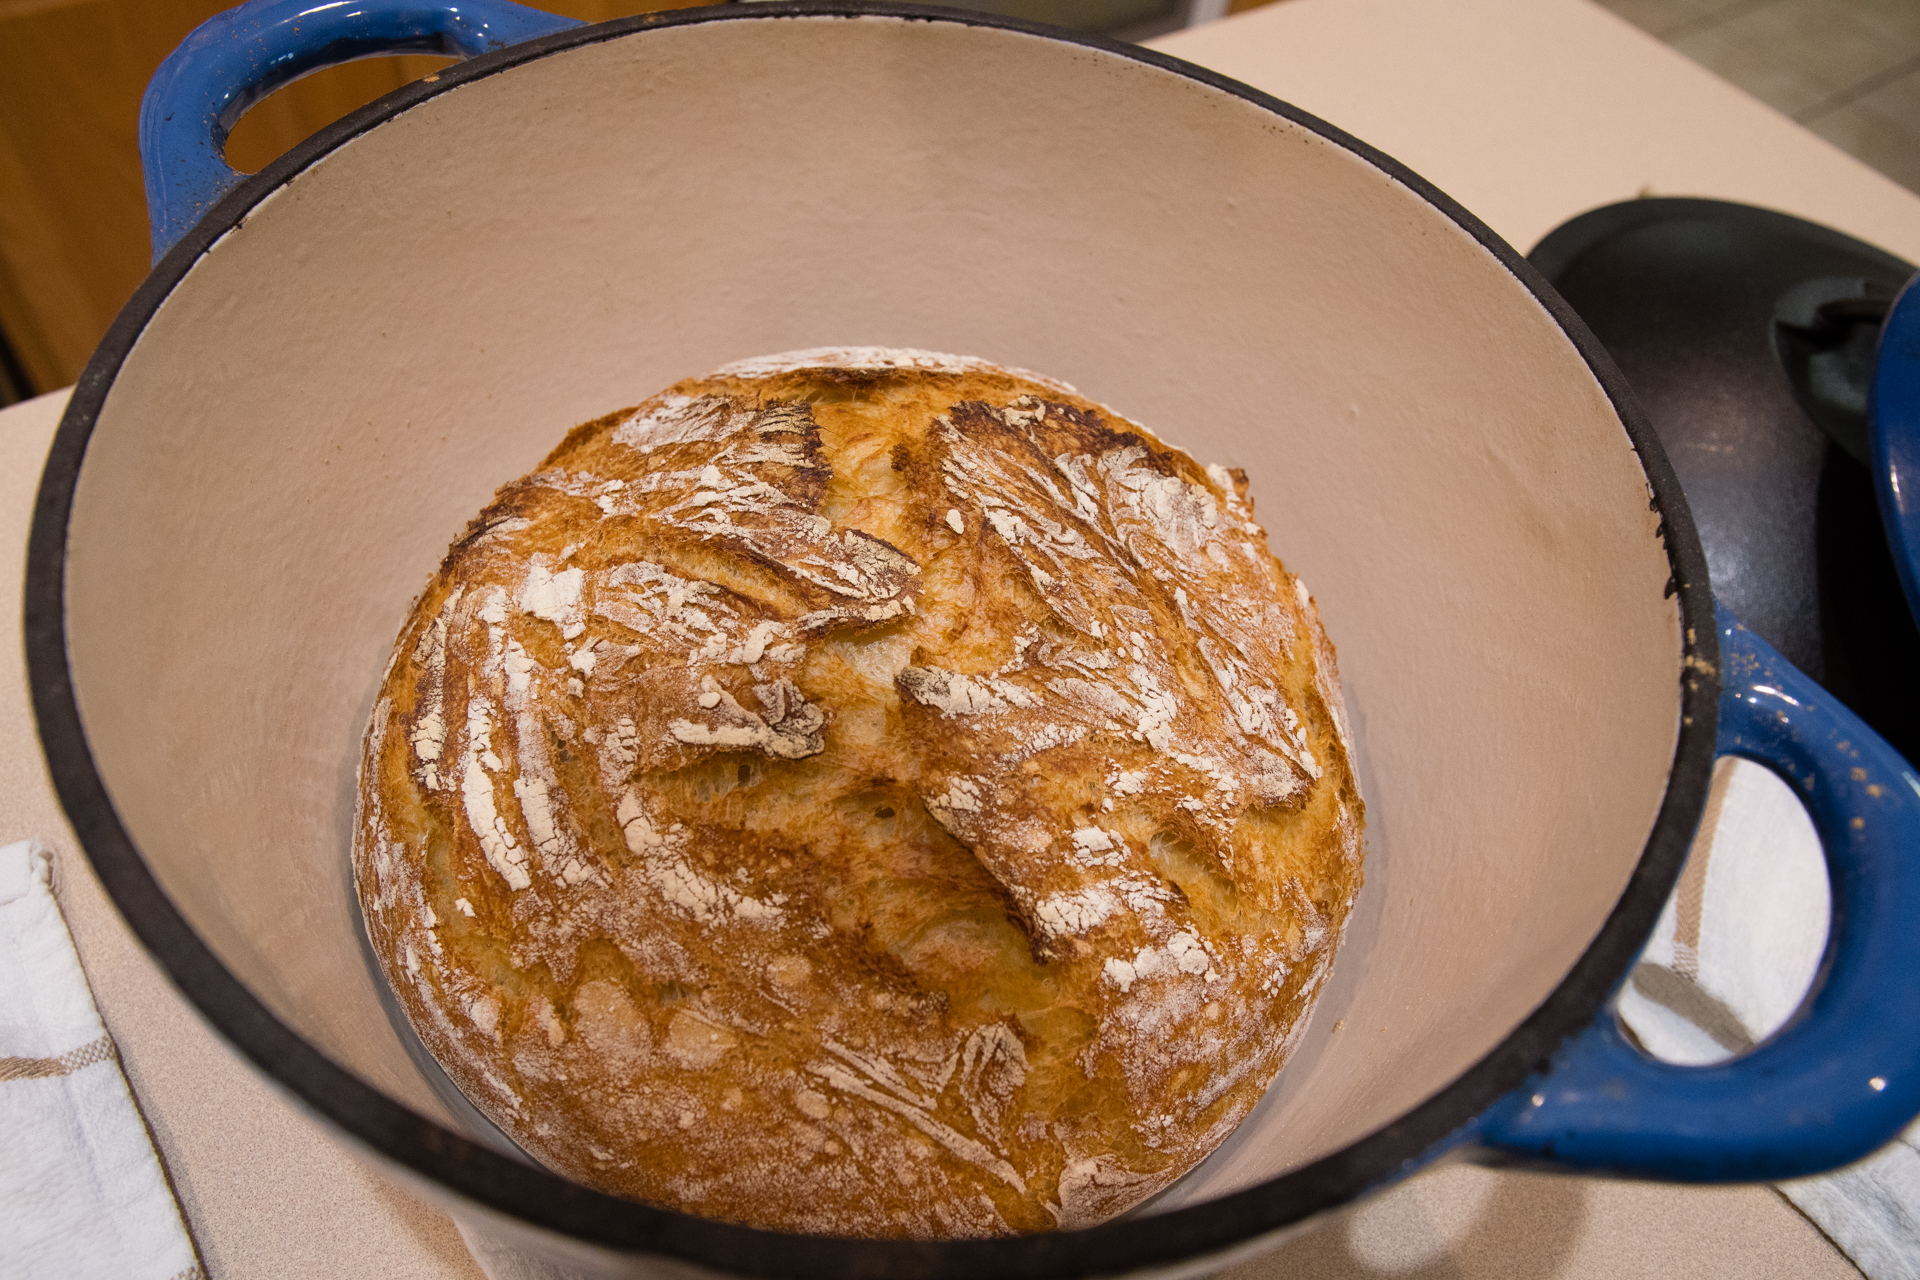
Sometime during the proofing place the dutch oven(s) into the oven and heat to 475F. If your oven takes 25 minutes to get to that temperature, give it at least 35 to heat up the dutch oven(s) properly.
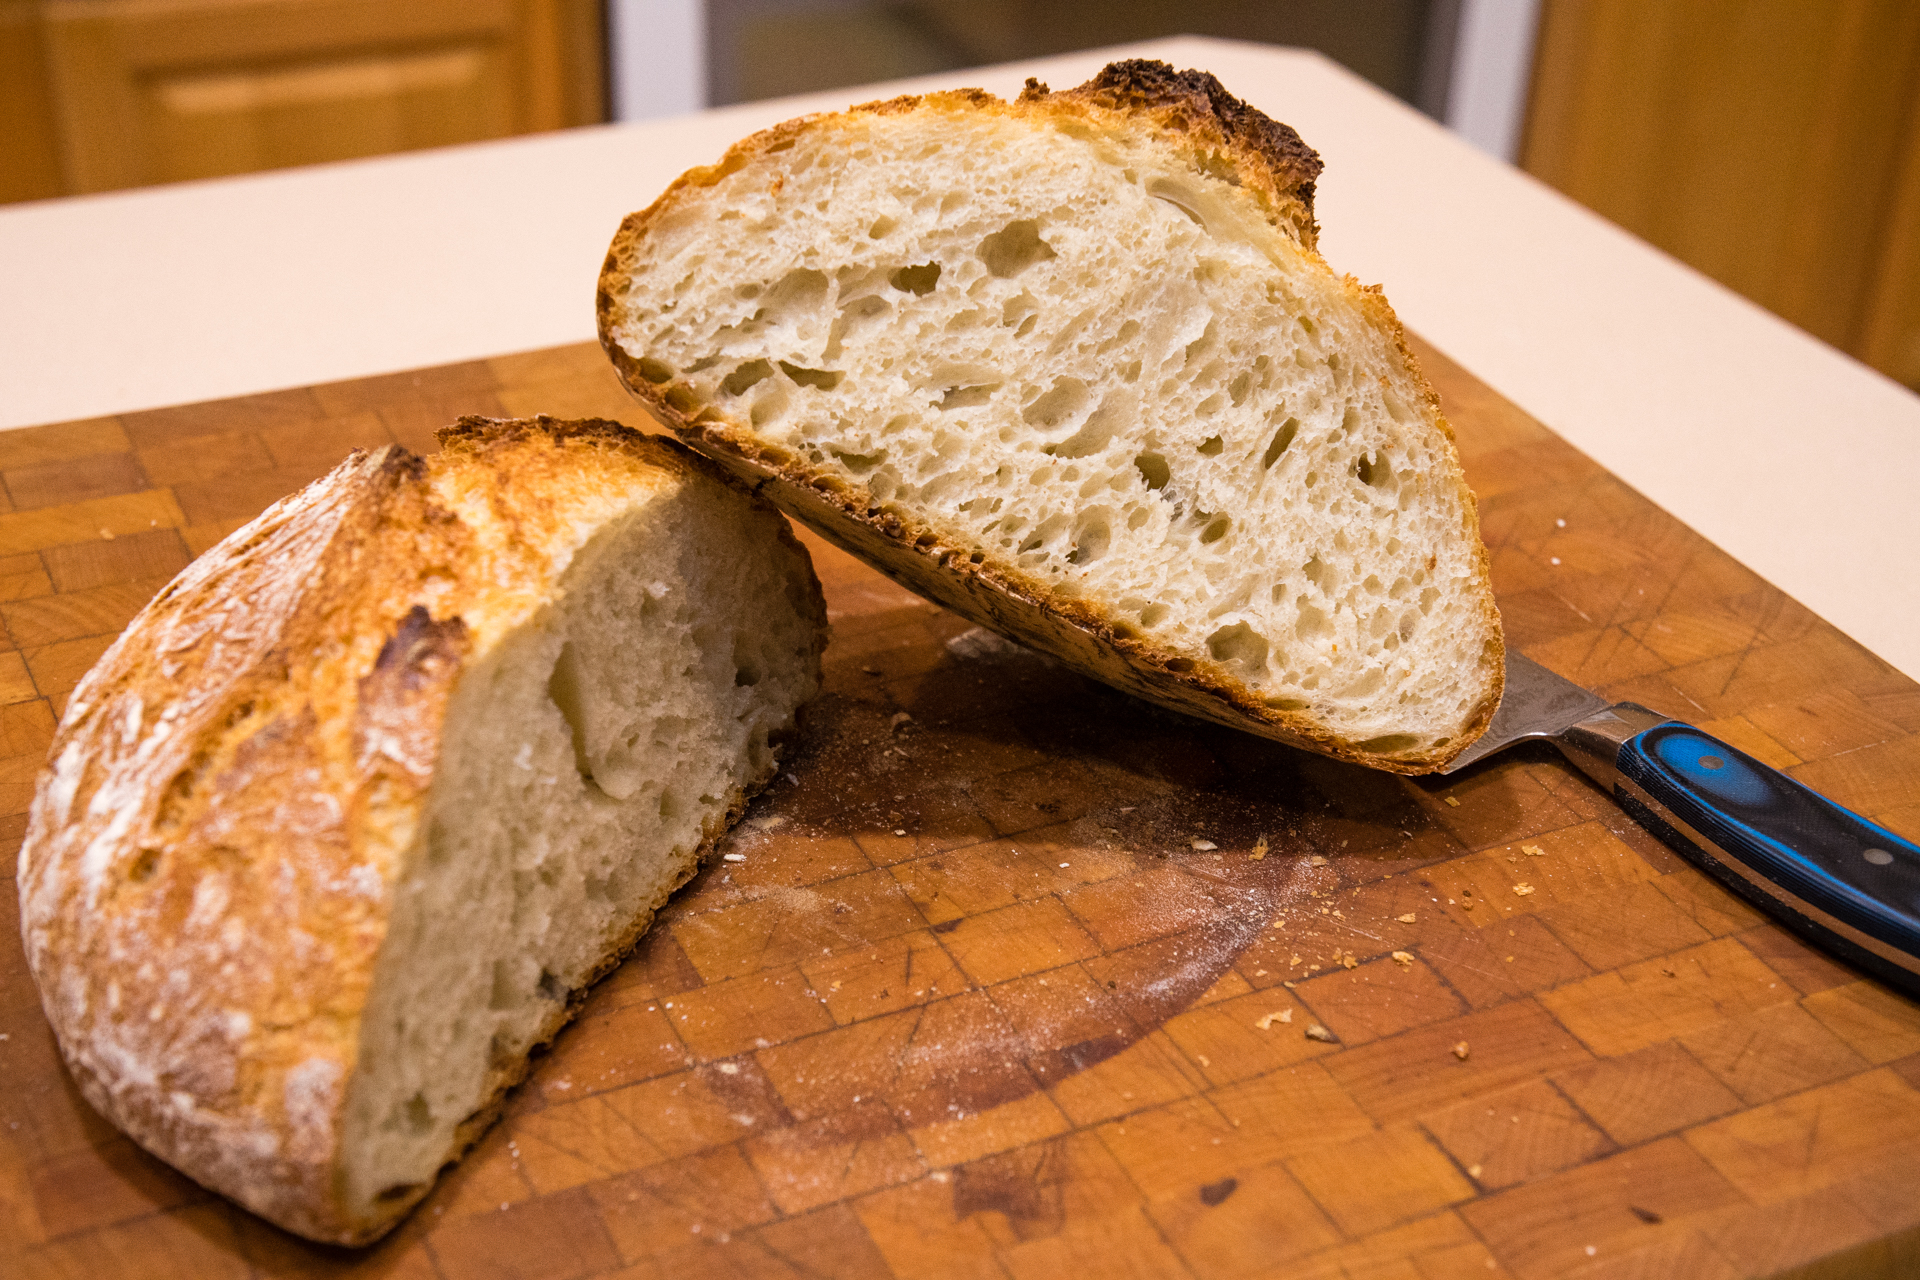
Proof for about 60 to 75 minutes. To test, poke the loaf with your finger about 1". If the hold springs back immediately, you need more proofing time. If it springs back slowly and leaves and indentation, it's perfect. Timing is fairly critical at this stage as a properly proofed loaf comes out much better. Today the proofing time was 70 minutes.
Remove the dutch oven(s) from the oven and take the lids off.
Invert the loaf onto a well floured surface. If you floured your baskets well, they should come right out. Otherwise they may need a bit of gentle coaxing. The bottom side when it was in the basket will become the top of your loaf. Grab the loaf by the sides with the sides of your hands and plop them into the dutch oven. If they don't land in the center, don't worry about it and don't try to fix it. The loaf will be fine.
Bake for 30 minutes with the lids on, then remove the lids and bake for another 15-20 minuted depending on how dark you want your loaves. Remove from the pan immediately and allow to cool before serving (if you can wait that long). I baked for 30+20 today. You can go even longer if you want an even darker crust, but I wouldn't go for more than 5-10 more minutes.
Stored in paper bags the loaves will last 2-3 days but will start to dry out. Stored in plastic bags they won't dry out and will store longer, but the crust will get soft. The French are masters at using dried out bread and there's lots of recipes for it. I usually make French toast with it on the 3rd day if I have any left over so I just store in paper.
For those who noticed, this is essentially a Ken Forkish recipe. He prescribes a couple of folding operations during the ferment stage. I've done it with and without and have found it doesn't make much difference and it adds an additional step of complexity. It does give the loaf a bit more structure and helps it to rise more during proofing and baking, but I find it unnecessary and I didn't do so today.

 = new reply since forum marked as read
Highlight:
NoneDon't highlight anything
5 newestHighlight 5 most recent replies
= new reply since forum marked as read
Highlight:
NoneDon't highlight anything
5 newestHighlight 5 most recent replies

eleny
(46,182 posts)I was making the artisan style like yours. Now I'm switching up and using a bread pan for them for easy toaster sized slices. The artisan bread makes a divine crust, though. Reminds me of the Lithuanian breads I grew up on back in NYC.
Bread is so forgiving. At first I worried over every loaf. Then my last loaf got me over that. I prepared an oatmeal bread with bread flour and oat flour. After two hours rising in the bowl I went over the recipe in my head and realized that I put 1/4 cup of water too little. So I just stirred in another 1/4 cup of cool water. It looked too watery so I kept sprinkling in more and more fine oat flour until the dough pulled away from the sides of the bowl.
The next morning I degassed it by mixing it with the handle end of a wooden spoon and let it rise again, then put it in the pan to rise again before baking.
I swear - this loaf has the best crumb of any loaf I've made so far. Go figure.
Btw, I store the breads in a plastic zip bag but leave it unzipped. That seems to keep it from going stale or being too moist. The crust stays nice and leathery, the way we like it. But our climate is arid here west of Denver. So YMMV.

alfredo
(60,331 posts)
procon
(15,805 posts)a month. All the local groceries are sold out, even Amazon is bare.
I've made sourdough starter in the past, but it was so long ago I can't remember how. I guess that's my last option so I need to go find a recipe for starter on the internet. I'll have to use all purpose flour, which will work just fine for now

Major Nikon
(36,927 posts)Bread flour is better for traditional pan loaf breads or bread machines. King Arthur flour has a high protein content, so it's close to bread flour anyway. Some southern flours like White Lily might not work as well since they have a lower protein content.
The only commercial yeast I've been able to find lately is active dry yeast which is fine if you know how to use it. Instant or rapid rise yeast is easier to use as you don't have to hydrate it prior to use provided your recipe is at least a 70% hydration level, which this one is.
Sourdough is great and produces better tasting results, but it takes quite a bit of flour to get it going and more to feed it each day. As flour is harder to come by, I'm just using commercial yeast. Each yeast packet is 7g, so I can get almost 2 batches and 4 loaves out of each package. I can stretch it even farther with a pre-ferment recipe as less yeast is required.

Sunriser13
(612 posts)procon
(15,805 posts)Sunriser13
(612 posts)Of course, that Major Nikon guy horns in on everything!


Squinch
(60,269 posts)I mean it. For the love of God! Don't bake bread!
I speak from experience.
Learn from my mistakes.

Phentex
(16,766 posts)and I've never seen it disappear faster than I am right now. I was thinking I'd have plenty of yeast to get us through but now I'm not so sure.
Squinch
(60,269 posts)alfredo
(60,331 posts)
cayugafalls
(5,984 posts)Interesting times and fresh made bread is so yummy. This looks easy and creates a nice loaf. I don't have any of the pans you use so I think I'll try and adapt the recipe to a bread pan and see what happens, you never know. I like the no knead idea as I have RA and kneading kind of hurts my hands.
Stay well.
Major Nikon
(36,927 posts)Even a 4qt sauce pan would work so long as it's oven safe and has a lid. Using a lid traps in the steam for the first 30 minutes and produces a much better crust. I'm sure the recipe would work just fine with a bread pan, but it won't be the same.
cayugafalls
(5,984 posts)I might try inverting one on top and see if that works. I'll let you know how it turns out.
Stay well.
alfredo
(60,331 posts)
Auggie
(33,347 posts)Beautiful effort, Major Nikon.

Laelth
(32,017 posts)
-Laelth

Pobeka
(5,017 posts)That's a good looking single day loaf. I almost always make the biga. I get a 50lb bag of low-gluent flour for about $19 at the local restaurant food supply place. I can't imagine how tough bread with normal gluten level would be!
Ironically, I'm now going to try to make a less elastic dough so I can make some sandwich buns kinda like Kaiser or Hoagie rolls. I tried using half of the biga last time to make small rolls and they're waaaaaay too tough and chewy! The poolish does make very good baguettes, if you've never tried...
Good work there, thanks for sharing !
alfredo
(60,331 posts)I have a hard time with white bread, so I make a whole wheat no knead Dutch oven bread. I put caraway seeds in it and it tastes wonderful.
Major Nikon
(36,927 posts)Or you can use any combination of whole wheat and white flour you like.
It won’t rise as much, but has more flavor.
alfredo
(60,331 posts)I let my no Knead WW bread rise for 16 to 18 hours. If I convert it to Sourdough, how much more time is needed?
Major Nikon
(36,927 posts)Last edited Wed Apr 15, 2020, 08:26 PM - Edit history (1)
One reason I like using polycarbonate tubs is you can accurately judge how much your dough rises. The dough will rise to a certain level and then it won’t go any higher. How ever much time that is will be the correct amount of time at least with the same amounts of yeast and same temperature. White flour with commercial yeast will almost always rise to at least double and sometimes as much as three times in volume. Sourdough is a bit less predictable, but a good active starter should produce as much rise, but time will depend on temperature and how much starter you use. Whole wheat flour will not rise as much.
I never add gluten. If I need more structure I will incorporate some folds early in the fermentation process.