Cooking & Baking
Related: About this forumWant sourdough, but worried it's too hard?
I'm still very much in the testing stage of this, but I just baked my first loaf today and I think I've devised a method of making sourdough starter that's so easy, anyone can do it. That's not to say making a sourdough starter is all that hard, but I think I've devised a method of making it pretty much foolproof with the added benefit of it's going to take about half the time or less to bake your first loaf. For those who noticed my yeast water threads, this method uses yeast water, but is much less complicated than my first foray into that method. The kinda cool thing about this is your bread will have a bit of raisin flavor to it which I find to be quite nice. If you keep your starter going the traditional way this will go away.
Things you will need:
1) A kitchen scale. This is the most important item. It doesn't have to be expensive. It doesn't have to even be digital although that's about all you're going to find these days.
2) Tea towels (2 or 3)
3) Flour. I highly recommend King Arthur All Purpose Unbleached if you can get it. Most any white bread flour will do. If you don't know the protein content read the label. 4g of protein per a 30g serving is a pretty decent protein content and should work well. 3g is what you'll find in many others and will work, but not as well. Some A/P flours like White Lily don't really have enough protein content, so I don't recommend them. Whatever you do, don't use self-rising flour.
4) Salt. Fine grain is what you want.
5) Purified water. Most any bottled drinking water will work. I used to use tap water and leave it sitting out on the counter overnight to dechlorinate. Many water districts(including mine) have gone to using chloramines. Chloramines are very difficult to remove regardless of what your home water filter company claims. You need a very elaborate water filtration system to remove chloramines which creates as many problems as it solves. Just use bottled water. It takes the worries out of it.
6) Raisins (I'm not kidding)
7) Mason jar(s)
There's a couple of other items which will make your life much easier if you plan on doing this on a regular basis. I'll leave a list and links at the bottom of this message.
This method is pretty unconventional, but it catching on in breadmaking circles because it works well. You don't even really need to maintain a starter with this method because from start to loaf only takes about 4 days.
Day 1:
In a mason jar (1 pint or larger) add 75g of raisins and 150g of purified water. It helps if the water is between 80-90F, but room temperature is OK. Put the lid on very loosely. Put in a warm place, higher is usually better. My place was exactly 80F which is ideal. If your place is cooler you might need an extra day or you might not.
Day 2: Stir and replace the lid. It doesn't hurt to stir twice per day, but do this at least once to prevent mold growth.
Day 3: The following picture was taken on day 3 a minute or so after stirring. The one on the right is day 3, the one on the left is day 1. Notice how there's lots of bubbles. This is what you want. If you don't get a lot of bubbles, give it another day.

On the evening of day 3, strain out the raisins. You should be left with about 100-115g of liquid. Measure this and mix with an equal amount of flour by weight. Place in a mason jar (1 qt or larger) and mark the level with a marker or a piece of tape. Leave in a warm place overnight.
On the morning of day 4, your culture should have at least doubled. If not, give it more time until it does at least double. Reserve 25g of your culture until you are done mixing. Skip to the end and I'll describe how to perpetuate your new sourdough starter. In a large mixing bowl add your culture, 10g of fine salt (about 1 1/2 tsp) 400g of flour and 250g of purified water (preferably between 80-90F or just shy of lukewarm). Mix everything until well combined and cover loosely and store in a warm place. I use my hand with a rubber glove for the mixing.
Wait until the mixture doubles or triples again. How long this takes depends on how active your culture was and how warm your kitchen is. It might take 2-3 hours or it might take the better part of a day. Be patient. Volume is more important than how long it takes.
Take out your dough onto a well floured surface. You may wish to give it a bit of kneading if your rise was fast, but the extended time used in preferment and fermentation means not much if any will be necessary. I don't. Shape into the loaf of your choice and place into a bread pan or roll up the sides of a tea towel to maintain the shape during proofing. Loosely cover with a tea towel or a piece of cheesecloth.
Proofing times vary, but for a 75F(ish) kitchen it should take about 1 hour. To test, sprinkle a bit of flour in a small area and poke about 1/2" with your index finger. If the dough springs back slowly and the indentation mostly remains, it's ready. If it springs back quickly and most of the indentation is gone, give it another 15 minutes and test again.
If you are using a loaf pan or baking on a cookie sheet, go to step 5 here:
https://www.kingarthurflour.com/recipes/the-easiest-loaf-of-bread-youll-ever-bake-recipe
If you are using a cast iron dutch oven (highly recommended), go to step 4 here:
https://cooking.nytimes.com/recipes/11376-no-knead-bread
So you saved 25g of your starter and you want to keep it going. Here's how to do that. Mix 100g of purified water and 100g of flour in a bowl along with your reserved starter until well combined. Place into a mason jar, cover loosely, and store in a warm place. In about 12-24 hours your starter will be ready to use to make a dough. Repeat this process every day. If you store your starter in the refrigerator, you can cut your feedings down to 1 week or a month apart. It will take a day or two of room temperature feedings before your starter is viable to make bread again. Alternatively you can just forget all that and start the whole process over. It only takes 4 days to bake. However, as your starter ages, the flavor of the bread will improve. It's a good idea to add 25% rye or some other whole wheat flour to your feedings.
Things that will make your breadmaking easier:
1) Round polycarbonate mixing tubs. These are found at most any restaurant supply. If you plan on making 2 loaves at once, go for the 6qt size. The 4qt size is fine for single loaves. Don't forget to buy lids because they are usually sold separately. The advantage to using them is you can do your mixing and fermentation in these and they have markings which make judging double or triple volumes easy.
https://www.acemart.com/catalogsearch/result/index?q=Round+Clear+Plastic+Food+Storage+Container
2) Banneton proofing baskets. Pack them with as much flour as you can get to stick to the sides before using. After you have shaped your loaf, these will maintain the shape you want during proofing and makes the whole process easier. The 8" round size is perfect for a 4qt cast iron dutch oven. Use a 9" if you have a 5 or 6qt.
https://www.amazon.com/s?k=Banneton+Basket
Proofing:

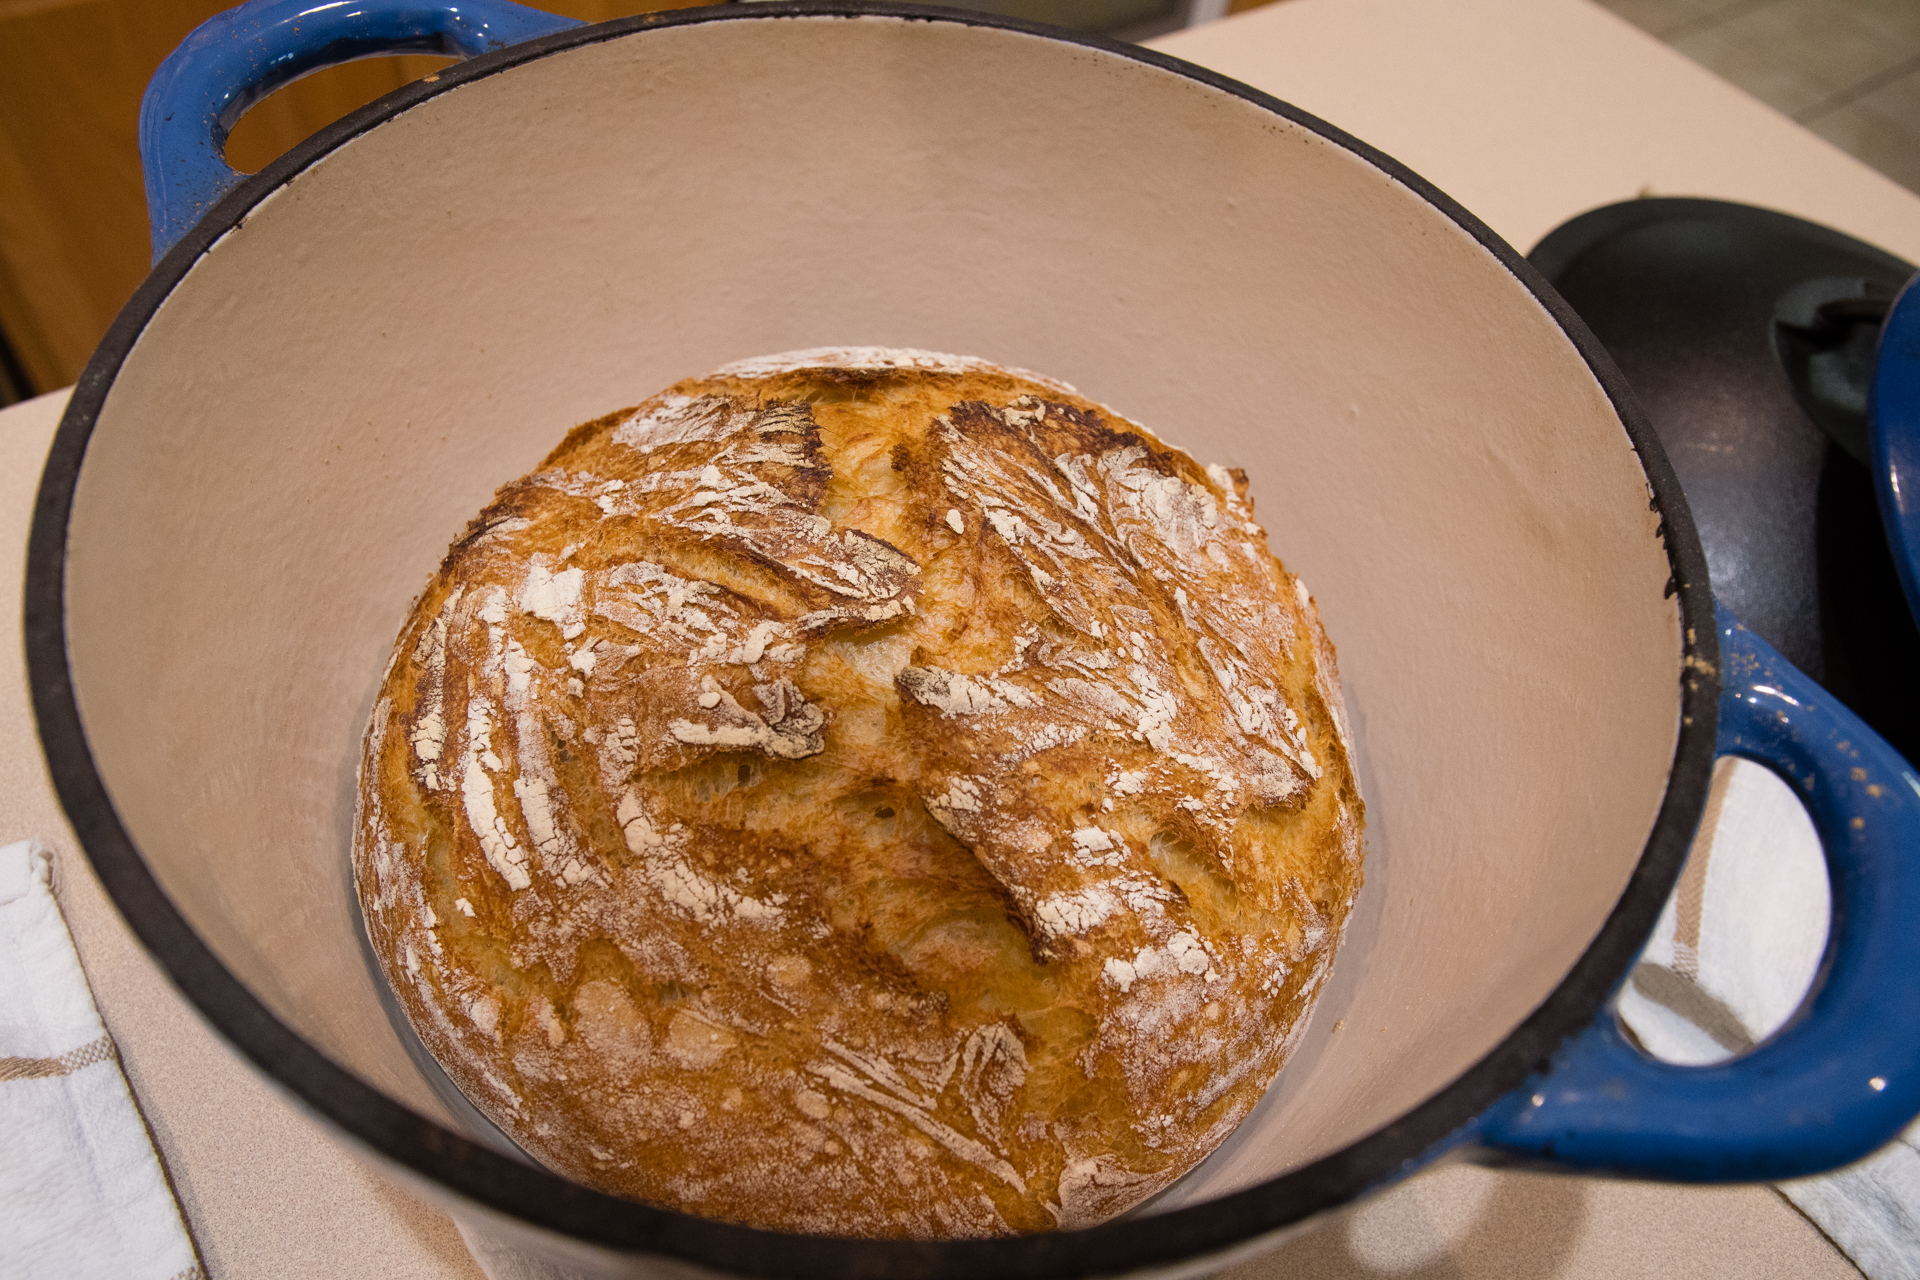
After baking:

 = new reply since forum marked as read
Highlight:
NoneDon't highlight anything
5 newestHighlight 5 most recent replies
= new reply since forum marked as read
Highlight:
NoneDon't highlight anything
5 newestHighlight 5 most recent replies
liberalmuse
(18,881 posts)I'm almost 5 days in on my conventional starter, but if that does not work, I will try this method. I'm using King Arthur whole wheat for, but I'd heard dates or raisins works, too. I'm going to have to get one of those cool-looking proofing baskets.

Major Nikon
(36,925 posts)You should be getting some really good starter action a few hours after feeding.
Proofing baskets just makes your life easier. I used other methods for many years and wondered why it took so long to start using them.
As long as you flour the hell out of them, you should not get any sticking and the loaves will plop right out. Sometimes if you are using a very wet dough with a high hydration level they will stick, but this will happen worse with just about anything else.
The most handy things are the poly tubs. You measure, mix and ferment all in the same tub and the lids are perfect for what you want. The graduated markings make judging volumes a snap and once you start making the same dough over and over you just know where it should be when it's ready.
liberalmuse
(18,881 posts)It's smelling yeasty and bubbly. My issue is my house runs in the 70's, slightly colder than the ideal temp for fermenting, but I have my starter wrapped up in towels. I can pick up one of those poly tubs at Smart Food Service. Thanks again!
Major Nikon
(36,925 posts)There's a dozen or more wild yeasts that you could potentially be culturing. Some of those are going to do better at colder temps and some will do better at warmer temps.
Lactobacillus sanfransicensis which is what makes San Francisco style sourdough propagates best at about 90F, which is considerably warmer than most kitchens. Many people will leave their culture in an oven that's off, but has the light on. My oven has two lights and will get up to about 95F if the door is closed. I can prop the door open a bit and adjust the temperature, but it's a bit tricky to get any degree of consistency and accuracy.
Some people like to keep their starter cooler in order to better cultivate other wild yeasts besides Lactobacillus sanfransicensis. So for them, your kitchen temperature probably is closer to ideal. By experimenting with different temperatures and different hydration levels and feeding flours, you can vary the end results significantly.

El Mimbreno
(820 posts)You wouldn't think this would work, but it did. On a California trip a few years ago, we picked up a loaf of San Luis Obispo Sourdough bread. When we got home, we took the centers out of a few slices, broke them up and mixed them with water and flour in a jar. Within 24 hours, the mix was bubbling like crazy. Feeding time, I leave ¼ to ½ cup in the quart jar, add 1 cup of a mix of white, rye, and whole wheat, and 2/3 cup hot tap water. Depending on temp, it will fill the jar in a couple of hours.
Great interior texture on your loaf!
Major Nikon
(36,925 posts)Internal baking temperatures are more than enough to kill off all the yeast in a loaf. Underproofing and/or underbaking can result in a rather doughy center so I could see how yeast might survive in that condition.
One common misconception is you can get a starter from some other person or some commercial bakery and produce the same results. However, even if you travel to San Francisco and get that magic blend of yeasts found in the starter of some famous bakery, that yeast is going to be gone after a few generations of feeding your starter. What and how you feed your starter is the biggest determinant of how the finished product is going to turn out.

machoneman
(4,128 posts)And I love sourdough anything too.

tclambert
(11,187 posts)pansypoo53219
(23,001 posts)
LiberalLovinLug
(14,641 posts)I am also experimenting with wild yeast. Can't buy it anywhere.
But I wanted to find a way to make bread that was not sour tasting. I don't mind sourdough once in awhile, but not every day. So I found what you are using. Fruit water. Your recipe is not actually a true sourdough in the sense that its not using simply the natural yeast in the flour, but rather using natural yeast found on fruit, and that fermentation process to jump start the process. And also I think because of this, it doesn't have as much time to go "sour". And the fruit water itself helps with flavour I believe.
Unlike you I don't think "as your starter ages, the flavor of the bread will improve" as it will increasingly get more sour tasting. But to each their own. If you like that great.
But the first bake is excellent in flavour doing it with fruit water. No sourness at all. Here are some of my pictures. I used apples. So my message would be to those that actually do not care for sourdough flavour to try it with water using apples or raisins, or any fruit, organic is best as it will have more natural yeast on it, and no chemicals.

Nice bubbly starter after sitting out all night

First attempt......fail

Latest loaf, yum!

Major Nikon
(36,925 posts)Their natural yeast bread does not taste sour as most of the French consider a sour taste to be a defect. I have personally maintained a starter for months without producing a single sour loaf.
In order to get a sour flavor, you have to culture acid tolerant organisms like L. sanfranciscensis which create lactic acid. The key to doing this isn’t time, it’s how you feed your starter. If you maintain your starter with a high hydration and remove almost all of your starter daily prior to feeding, you won’t get a sour taste. The opposite produces the opposite result.
LiberalLovinLug
(14,641 posts)it is mostly from what I've read on the internet. I am just starting out with this , and haven't even made that much bread on my own before this. I was making some assumptions. I read things like natural yeast bakers will use fruit water starters with cake flour to make deserts for the very reason that it has a sweet note. Opposed to sour. I assumed that unlike using raisins and apples etc to start the process, and using strictly flour and water, you'd have more residue yeast and fermentation to begin the process with and thus come to a usable starter sooner, eliminating the time it takes for a strictly flour/water starter to get to the same usability.
I can see how switching out most of the flour/water every day would reduce the sourness. Maybe its just that most people aren't diligent with this. Thanks again!
Major Nikon
(36,925 posts)At least from what I’ve been able to find. I’ve only baked a few loaves using that method using a couple of different ways of doing it. Neither has produced a sour loaf and I’m not sure it’s even possible to do so as I’m not sure such a wet environment is conducive to propagating the necessary organisms. Some people are big fans of San Francisco style sourdough. I’m not one of those. I prefer the French levain style.
One thing I’m going to eventually try is freezing yeast water. In theory you should be able to freeze it and go from zero to baking a loaf in a day. If it works you should be able to store a practically ready to make starter for a year or more.

AtheistCrusader
(33,982 posts)I don't know what the hell. I didn't use a metal bowl or spoon. No chlorinated water. Everything was fine, and then they were dead.
Major Nikon
(36,925 posts)What I did do was convert one to a traditional starter fed with flour.
It basically works like this:
Take your 4 day old raisin yeast water and strain the raisins. Weigh the amount of liquid you get. Should be at least 100g. Add an equal weight of a/p flour, combine well and cover loosely. Store in a warm place.
After 12 hours, overnight, or the next day your starter should have at least doubled in volume. Reserve 25g of your starter and discard the rest or use it to make bread. Add 25g whole wheat flour, 75g a/p flour, and 100g of purified water combine well and loosely cover. Repeat this process every day or store in the refrigerator and do weekly feedings.
An easy way to maintain a starter is weigh the container you keep it in when it's empty. Write down the weight. When you've removed most of the starter prior to a feeding, the weight of the container will be 25g more.